
Materials needed:
- 2 aspect target faces with LEDs (from eBay, try this search)
- 1/8" brass tubing, K&S 1145 (from eBay, try this search)
- Wire, #24 or smaller (telephone wire works fine)
- Spacer, round, to simulate relay enclosure - or a 1x1 Lego drilled out works also.
- Keys from scrap computer keyboard
- Ladder stock, or can be cut from plastic canvas material
- Paint, Testor's flat steel or aluminum (not arcylic!)
- Paint, concrete color (acrylic white + one drop grey + one drop yellow)
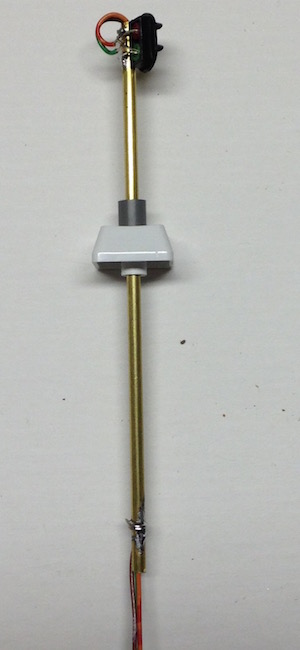
Overall assembly
- Cut brass tube to length and deburr, figure 2" for the signal mast, plus enough to penetrate your scenery and emerge below the layout. I use 5" as my layout is built on 2" Styrofoam.
- Assemble LEDs into target faces. Be sure the (-) leads are on the same side, facing where the target will mount to the mast.
- Position the target face in place on the mast. Fold the two LED (-) leads over the tubing and solder in place. This will not only support the target face, but the tube itself will provide the (-) conductor for the LEDs.
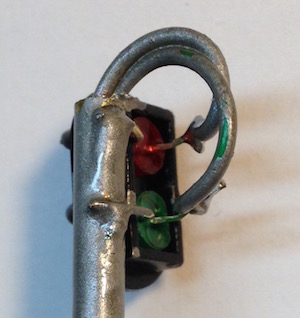
(-) leads soldered to tube - Slide the round spacer up on to the tube. The spacer has no function other than appearance as a relay enclosure.
- Drill a hole in the center of a computer keyboard key, which is used as a base. It should be a tight fit onto the tube. Slide it up into place. Set the base to desired height. I use 2" from top of target face to the top of the base.
- Solder a wire onto the bottom of the tube to provide the (-) connection under the layout.
- Fish two wires thru the tube, and solder one to the (+) side of each LED.
- Assembly is ready to test. Use a 9v battery with a dropping resistor between 330 and 1000 ohms. (This assembly does not include dropping resistors, as my resistors are mounted on the controller under the layout).
- Paint base concrete color, and mast steel or aluminum color.
- Glue ladder stock in place, and block number boards if used.
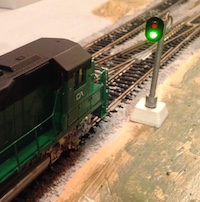
- Place signal in position and connect under layout.